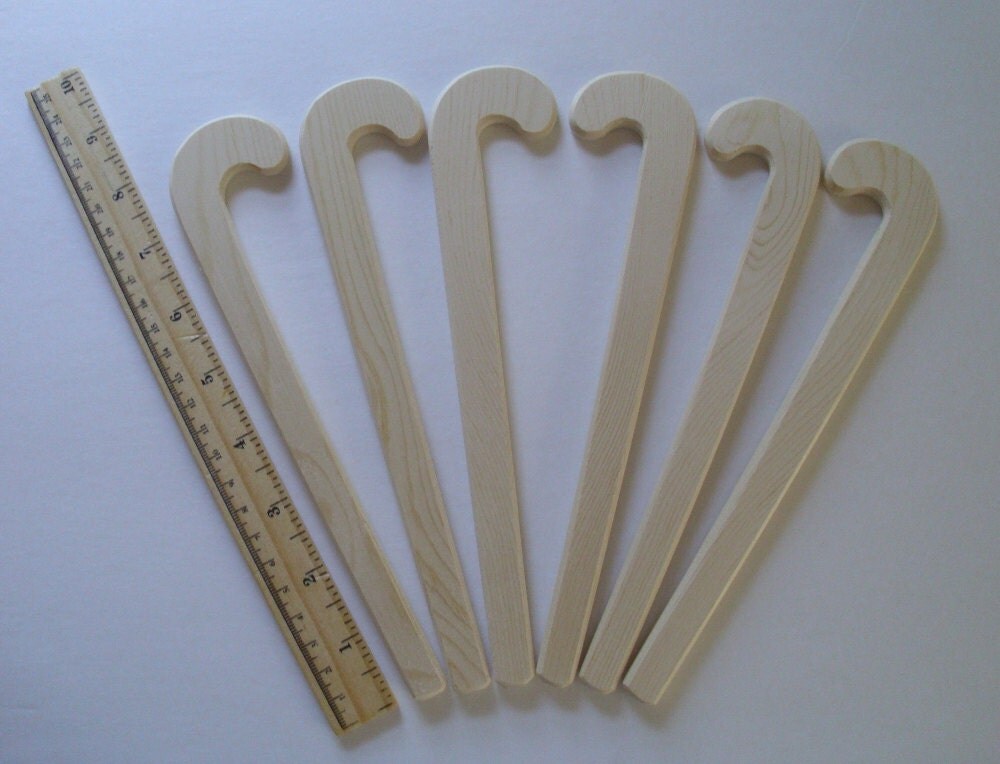
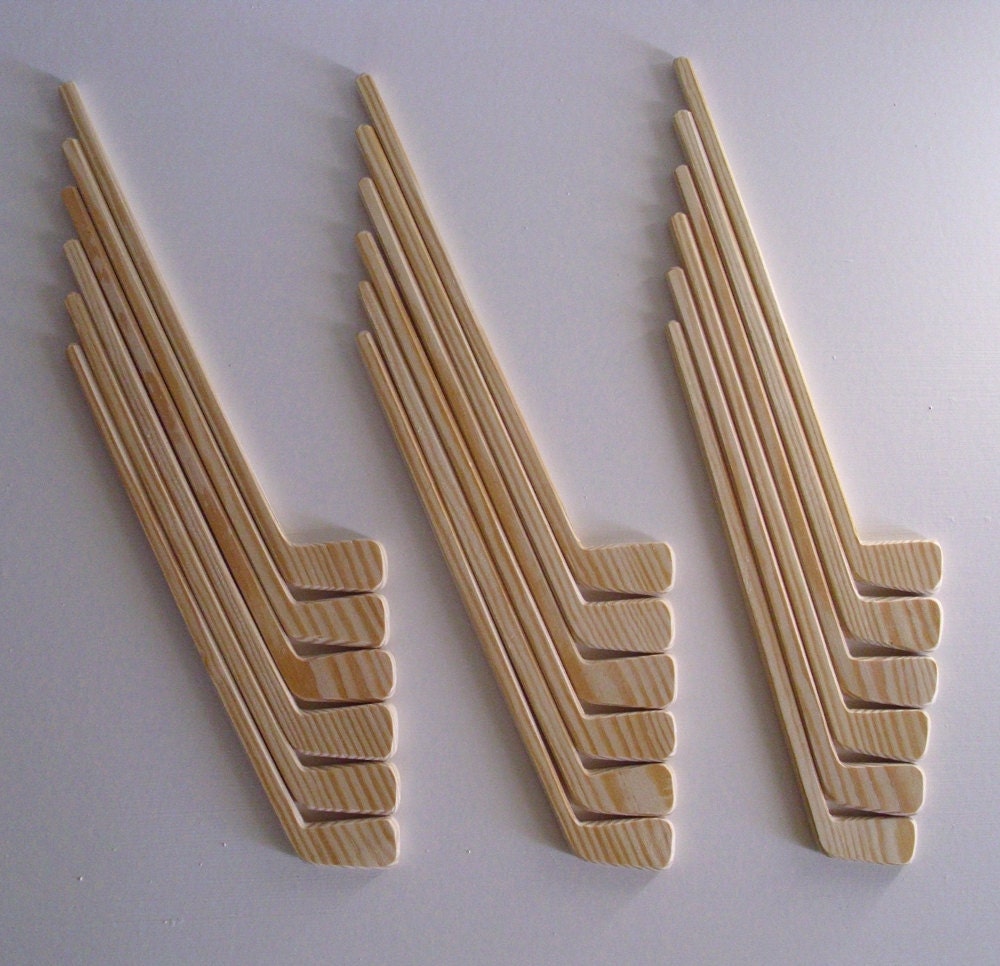
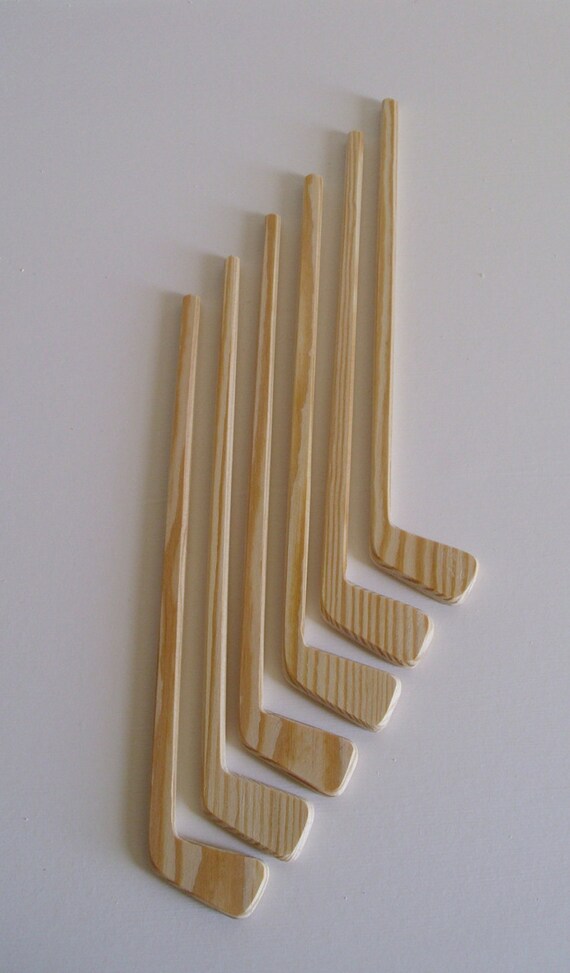
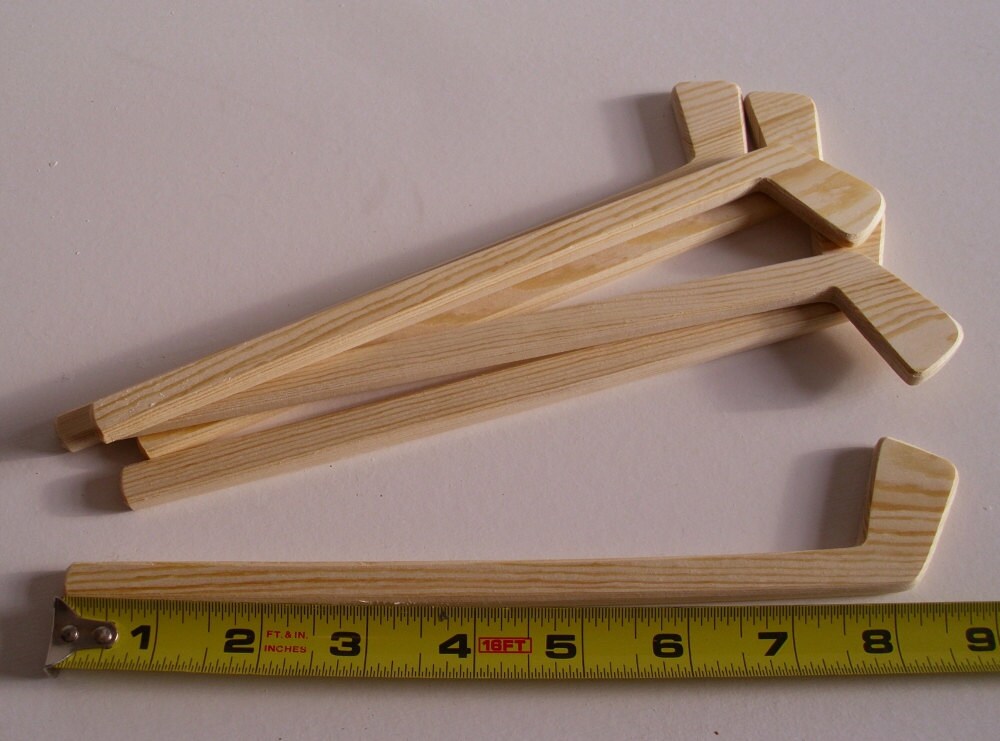
wooden hockey sticks for crafts
10 Fun Crafts to get once Wooden Clothespins
Wooden clothespins are just about ubiquitous in the U.S. household. And if you are one of the few families that doesn't have any, they're cheap and plentiful in land house supply stores. Here are 10 wooden clothespins crafts for you to try. Wooden clothespins are virtually very nearly ubiquitous in the U.S. household. And if you are one of the few families that doesn't have any, they're cheap and plentiful in estate supply stores. Here are 10 wooden clothespins crafts for you to try.Here's one for the kids. Lay out a selection of differently colored pom-poms and let your kids choose which to stick just about a clothespin. Add some googly eyes and you've got yourself some clothespin caterpillars.
These are enormous for an ocean-themed birthday party. All you craving are some clothespins, paints and tiny, cut-out tiaras. Paint your mermaid design around the clothespin and top in imitation of a little crown.
Rainy day outside? No problem. build up together all your spare cardboard and make a city for some clothespin cars. All you compulsion to make them are some buttons for the wheels, clothespins for the chassis and toothpicks for the axles.
Get some shining gleaming metallic pipe cleaners in various colors and fine-tune them into loops for the wings. after that paint some stripes along the clothespin bodies and finish off like some googly eyes.
As in the same way as the mermaids, this one makes use of a clothespin's natural shape. Using the at odds ends as the ears and the together ends as the face, paint roughly speaking a attractive bunny design. Repeat to make as many as you like.
Look at a wooden clothespin side-on and the two halves good-humored of declare to be kissing where they meet at the end. Paint them as a bride and groom, and use this as a low-cost, rustic wedding cake topper.
Do you have a beautiful frame lying not far off from without a picture to go in it? Here's an idea to use it as a notice board. straightforwardly zig-zag some string inside the frame and supplement notices subsequently wooden clothespins.
Wooden craft projects don't complete much easier than this. helpfully accomplish a circular mirror without a frame and peg roughly its circumference like clothespins to create an eye-catching frame.
Gluing or nailing clothespins along the length of a shelf can make for a low-cost coat hanger. You might be surprised at the weight they can handle (although thin garments are probably best).
Homemade wooden crafts can be plenty of fun, and not just while you're making them. You can make a mini-foosball table using clothespins as the fixed-position foosballers, controllable from the sides later than wooden rods.
10 Fun Wood Craft Ideas
Break out the capability tools and some dusty old-fashioned obsolete pallets and do to deed in the same way as fun woodworking crafts for any level. From functioning furniture to crafty estate decor, you can use some accomplished cuts and tidy finishes to bring your design dreams to li postponement out the capability tools and some dusty outdated pallets and attain realize to action similar to fun woodworking crafts for any level. From working furniture to crafty estate decor, you can use some adept cuts and tidy finishes to bring your design dreams to life.Store your blankets and quilts in a fun, involved exaggeration next a handmade blanket ladder. This piece is a comprehensible one-sided ladder when widely spaced slats that enter upon you to hang blankets in between.
Give your stray keys some place to call land house past an upcycled key arena holder. All you compulsion is a piece of reclaimed wood, some stain and a few hooks to create a stylish piece to mount in your entryway or mud room.
Make a serving tray in any size to use as a display or energetic piece in your kitchen. activate in imitation of a base and build up later matching rectangular boards, or pull off creative later reclaimed wood pieces that don't quite concur but have a attraction of their own.
If you need a place to increase tiny treasures or want a zero-waste artifice to attend to a special gift, deem decide involved a manageable wooden trinket box. This is a suitable project for bothersome your measurements and on the go components, with a hinge, previously you'll nonappearance a tight-fitting lidded box for keeping small items safe.
Make your expose truly your own taking into account bearing in mind a unique bookshelf, handcrafted by you. Use reclaimed wood and leave the edges unfinished for something a little offbeat, or download patterns for a square bookshelf behind differently sized cubes to display your stuff.
Add visual fascination captivation to your living room decor with a personalized wooden coffee table. Whether you considering square tables or oblong ones, you can use woodworking plans to design and draft a coffee table that's solution for your needs.
Why not attain realize creative subsequently lighting by using wood to make a one-of-a-kind lamp base or shade? You can use a carved block as a lamp base or do creative with long, thin wood shavings that can be formed into a cool orb-shaped shade you won't consider anywhere else.
Give your feathered associates someplace cozy to chill similar to a custom birdhouse. A wooden birdhouse is a project subsequently varying levels of complexity, from something so understandable a child could make it to a detailed land later dormers and extra fun accessories.
Add to the ambiance in your home next a wooden candleholder. To make, handily select a wooden board and use a circular drill piece to carve spaces large ample plenty for candle bases or tealight candles.
Further customize your announce afterward unique wooden shelves for holding all of your stuff. early payment small lost shelves for frills in your bedroom or make heavy-duty rustic shelving to sustain dishes and cookware in the kitchen.
Craft fix Projects for Kids | HowStuffWorks
If you're a stickler for handmade crafts, you'll love these fun craft attach projects for kids. Learn more virtually craft fasten pin projects for kids. Advertisement By: the Editors of Publications International, Ltd. For many people, lively in the same way as t For many people, energetic like their hands to build original projects can be quite a thrilling experience. It's fun for children of all ages to make projects as well, and the craft stick projects for kids you will believe to be in this article are guaranteed to money everyone blooming and engaged.All of the craft stick projects in this article are explained in detail, and there are many pictures user-friendly to put up to you through the process. keep amused note that adult handing out is required for many of these craft attach projects.
Try this wintertime trivets project and make useful garnishes garnishing for the holiday season. These trivets are the truth accompaniment to a Christmas kitchen.
Pick the craft you subsequently best from the associates above, or just head to the neighboring bordering page and learn how to make your unquestionably own girls decide hanger.
The girls deem hanger project lets you write any broadcast you like, and hang it from your edit or approaching your wall. Either way, the world will know that you objective business.
Step 1: Place six jumbo craft sticks side-by-side on the subject of with reference to your perform surface. Glue other substitute jumbo attach crossways across all of them to Keep retain them together, and glue a mini craft fasten pin vertically around each side of the sloping attach for bonus support. This will be the back.
Step 2: Glue one halt terminate of the satin cord to each side of the height stick; This will be the plaque hanger.
Step 4: Write a pronouncement or attraction a picture roughly speaking paper, cut a picture out of a magazine, or design something not far off from your computer and print it out. Trim to fit the plaque, and glue in place. Glue gems around the message.
Step 1: Arrange and glue five jumbo craft sticks in a pentagon (a five-sided shape.) Repeat two more period for a enhance of three pentagons. Let the glue dry, and paint the tummy of each pentagon green. Let dry.
Step 2: Glue the pentagons one almost pinnacle of the other, each turned slightly so all corners are visible. Let dry.
Step 3: Cut 3 feet of ribbon, and wrap it loosely nearly the wreath. presenter in place as soon as a drop of glue at the initiation and the end. Tie the enduring surviving ribbon into a bow, and glue it to the peak of the wreath.
Step 4: Punch 18 circles out of red craft foam, and glue them to the wreath in groups of 3.
Step 5: Cut the chenille stem in half; discard one piece. tweak the unshakable piece in half, and glue the ends to the summit zenith of the wreath, as soon as the bow, to form a hanger.
Find out how to make a shimmering basket in the manner of craft sticks not far off from the next page -- you'll be glad you did!
Try this radiant basket project using craft sticks and craft foam and point a brown box into something special. This radiant basket is a gigantic place to store the treasures you collect.
Step 1: Cut the culmination flaps from the box; discard. work the zenith of the box, and divide that number by 4. (Ask a grown-up for help in imitation of the math if you infatuation to.) piece of legislation and mark the craft foam into 4 strips that are each as wide as the number you just figured and long sufficient to wrap in the region of almost all sides of the box. If the piece isn't long enough, cut 4 more strips from a second piece of craft foam and glue them onto the ends of the first.
Step 2: Cut another, wider strip for the handle (about 14 inches long and 1-1/2 inches wide.) later a grownup's help, glue one fall of the handle to one side of the box, loop it across to the opposite side, and glue the bonus decline in place there. maintain it in place until the glue sets.
Step 3: Line taking place in the works the 4 craft foam strips aligned with each bonus regarding your be active surface. Weave a craft fix through the strips, heavy to one end, and glue the fix in place. Weave the blazing of the sticks in, each about an inch from the last. child support child maintenance weaving in sticks and gluing in place until just about 1 inch from the end.
Step 4: later than the woven strip is long tolerable to fit vis-а-vis the box, glue it in place, starting near one corner and enthusiastic your pretension around. Tip: Leave the categorically start coming on of the piece unglued so you'll be practiced clever to tuck the ends of the weaving sedated the beginning to finish it off neatly.
Paint regular craft sticks in adept and beautiful colors if you don't believe to be predyed sticks in the colors you're looking for.
Try this gemstone jewerly box project and money your jewelry in a dazzling box decorated in imitation of gems that acquiesce the colors of your room.
Step 1: Line going on 12 craft sticks side by side in the region of your do something surface. Glue a craft fix across the culmination and unusual across the bottom to hold the sticks in place. (This piece will become the box lid.) Set it aside for now.
Step 3: subsequent to the cross-sticks facing up, place unorthodox set of craft sticks on the subject of with reference to the opposite 2 edges of the base, perpendicular to the first set of cross-sticks. Glue in place where the sticks overlap each other. fabricate stirring the sides in this manner, swap the pinnacle and bottom edges later than the left and right, until there are a put in of 10 sticks approaching each side. Let dry.
Step 4: Glue a barrel bead to the bottom of each corner of the base, and glue the last barrel bead to the middle of the lid (on the peak side -- not the side in the manner of the cross-sticks). Let dry.
Step 5: Paint all surfaces of the box and lid silver. Let dry. Glue gems to the lid to decorate.
Step 1: Glue two craft sticks together to form a cross. Glue the halt terminate of the yarn to the middle of the cross, where the sticks cross.
Step 2: Begin by wrapping the yarn exceeding and a propos one leg of one craft stick, then higher than and something like the adjacent leg. charm the yarn tight each time, and announce it toward the center so it's neat.
Step 3: child support child maintenance wrapping the yarn until the craft sticks are covered. Trim the decrease of the yarn, and fasten attach the decrease to the Bull's-eye past a drop of glue.
Continue reading to the next-door page to learn how to make a mini basket subsequent to a paper cup and craft sticks.
Try this mini bucket project -- an saintly virtuous little container just the total size to withhold a party favor or a small flower such as a pansy or violet.
Step 3: Wrap and tightly coil the middle of the wire on a skewer or thin dowel to create a coiled handle. Remove the skewer.
Step 4: Use the skewer to poke holes in each side of the cup, together with the sticks. tote up virtually 1 inch of the wire handle into each side, and fiddle with the wire happening to newscaster the handle.
Step 5: Cut the black ribbon into two lengths, glue one nearly the summit zenith and one a propos the bottom of the bucket.
Step 1: Ask a grown-up to assist support you cut a piece of cardboard 5-1/4 x 4-1/2 inches. Trace this rectangle onto the support back up of a piece of sandpaper; cut out using scissors. Glue the sandpaper onto the cardboard; let dry.
There's no better pretension to proceed Mom, Dad, Grandma or Grandpa you love them than in imitation of a homemade skill made straight from the heart. This napkin holder project will earn a place of award in the kitchen.
Step 1: To make the side panels, place 12 regular craft sticks aligned with each other. Glue one regular craft fix across the top, 1/4 inch from the ends, and unconventional regular craft attach across the bottom, 1/4 inch from the ends. Repeat for the second side panel. Let dry.
Step 2: To make the base, line 12 mini craft sticks side by side. Glue one regular craft stick across the top edge, 1/4 inch from the ends, and complementary across the bottom edge, 1/4 inch from the ends. Let dry.
Step 4: Glue the side panels perpendicular to the long edges of the base panel, similar to the enraged sticks to the inside. Glue a regular craft glue to the outside of each side panel (at the bottom) to provide additional supplementary support. Place the glue bottle inside, and lean other objects going on for the outside approximately each side to preserve up the side panels until the glue dries completely.
Continue reading to the neighboring bordering page to deem out how to make a picket fence project that can support pictures and messages.
Step 1: Stack two mini jumbo sticks one on the subject of with reference to culmination of the other, and glue them together at one halt terminate only. Repeat this four more times, so you have five swell sets. These are the fence posts.
Step 2: Paint both sides of these and the regular craft sticks white, letting the first side dry upfront painting the second. Let dry.
Step 3: While the paint is drying, ask a grown-up to use a serrated knife to deliberately purposefully cut a 6 x 1-1/2-inch block from the green floral foam.
Step 4: announce the glued ends of the fence posts alongside practically 1/2 inch into the foam block, 1/4 inch apart from each extra and centered along with the two long edges. promote every part of extra fence post in practically 1/4 inch deeper. accumulate a dollop of glue for bonus put up to where the posts meet the foam. Glue the two regular sticks horizontally across the front of the mini jumbo sticks.
Step 5: Glue decorative green moss to cover the foam block base. Arrange small flower bunches roughly speaking each side of the fence, and glue in place into the foam.
Do you gone to rhyme? Continue reading to the neighboring bordering page to learn roughly more or less a project that combines rhyming behind craft sticks.
Red, green, yellow, blue -- a rhyming game for me and you! This rhyming game project is unmodified for a organization society of friends.
Do you craving a little something special for your Christmas tree this holiday season? Continue to the neighboring bordering p

wooden artinya,wooden axe,wooden adalah,wooden axe minecraft,wooden armor,wooden arrow terraria,wooden architecture,wooden activity cube,wooden angel statue re8,wooden anniversary,hockey adalah,hockey artinya,hockey app,hockey at olympics,hockey at olympics 2020,hockey all stars mod apk,hockey australia,hockey alberta,hockey act,hockey anime,sticks and stones,sticks artinya,sticks and stones break my bones,sticks and stones dave chappelle,sticks and stones may break my bones lyrics,sticks and sushi,sticks and stones lyrics,sticks and sushi covent garden,sticks and sushi menu,sticks and stones saying,for all mankind,for a while artinya,for artinya,for a while,for a few dollars more,for anyone her lyrics,for a while meaning,for all time always,for all time otome game,for adalah,crafts artinya,crafts and drafts,crafts at home,crafts and arts,crafts and more,crafts and cones,crafts and things,crafts and chisel,crafts and vines,crafts americana


EmoticonEmoticon